Vendors

Overview

  • Vendors

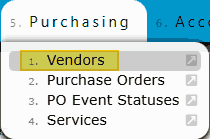
    Vendor General Key Information:

    Create and maintain vendor information to support the purchasing and accounts payable processes. The Vendors module serves as the central hub for managing supplier data, ensuring accurate communication, purchasing efficiency, and financial consistency across all vendor-related transactions.

    Vendor information stored here connects directly to purchasing workflows such as purchase orders, receipts, and invoice processing. Keeping vendor records updated ensures seamless integration across all purchasing and accounting activities.

    General Vendor Information
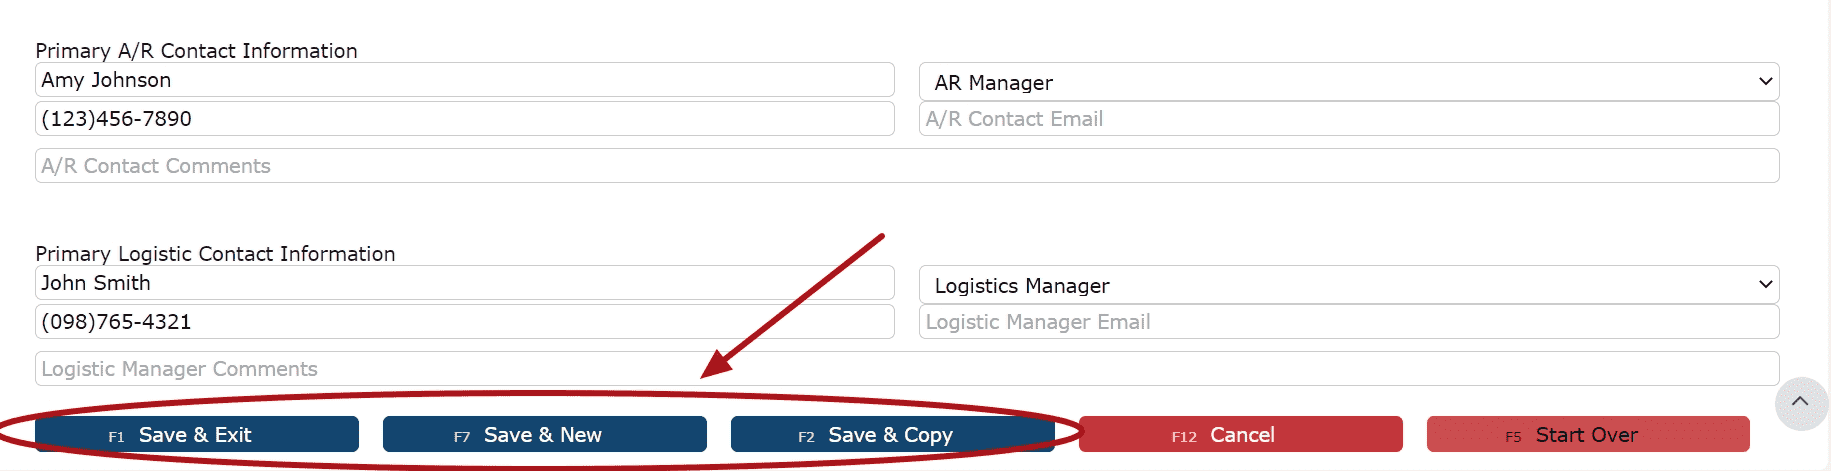
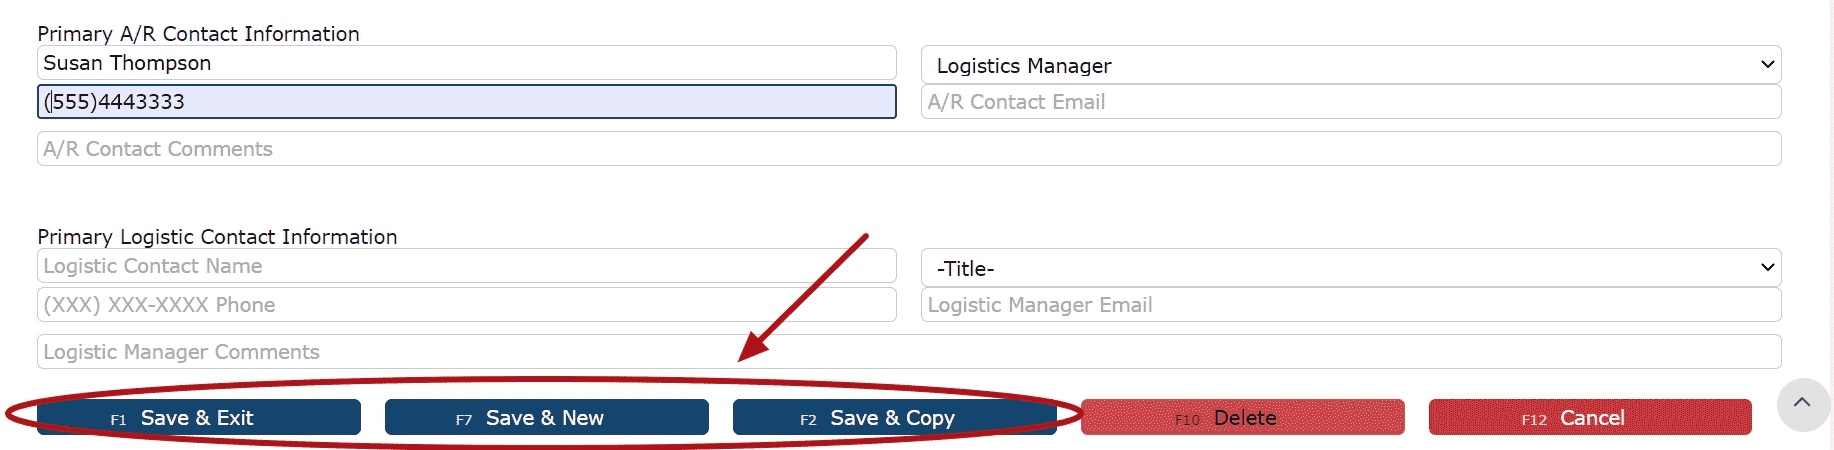
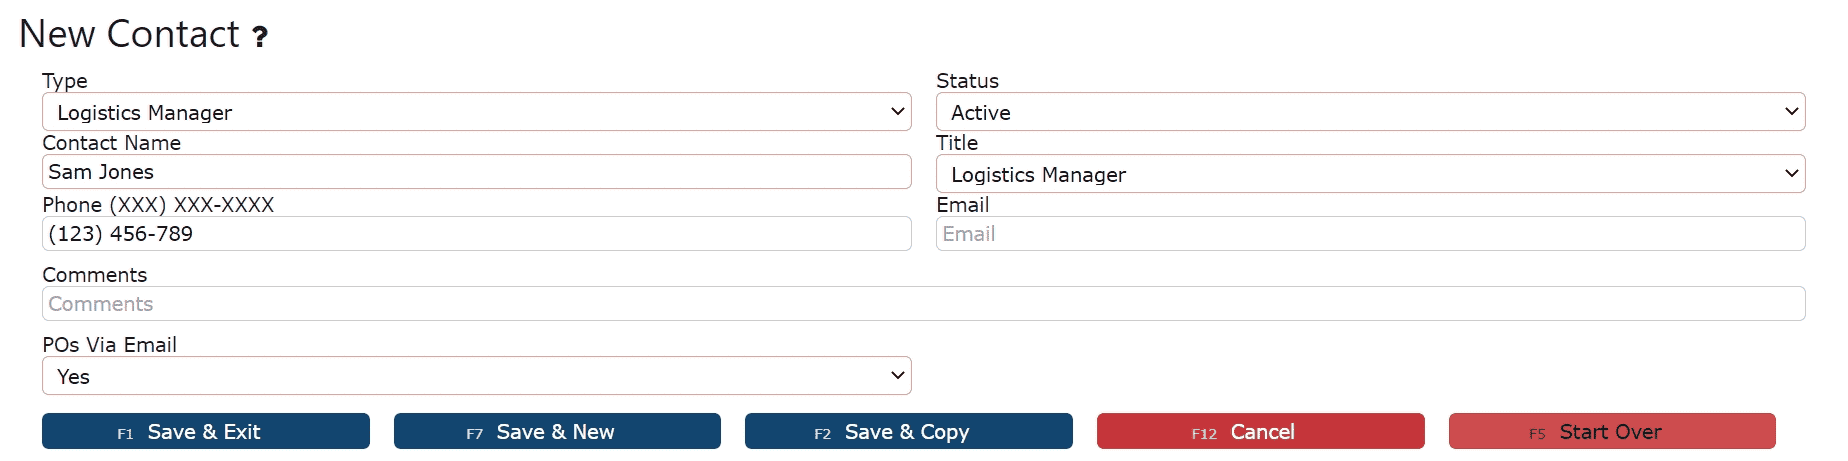
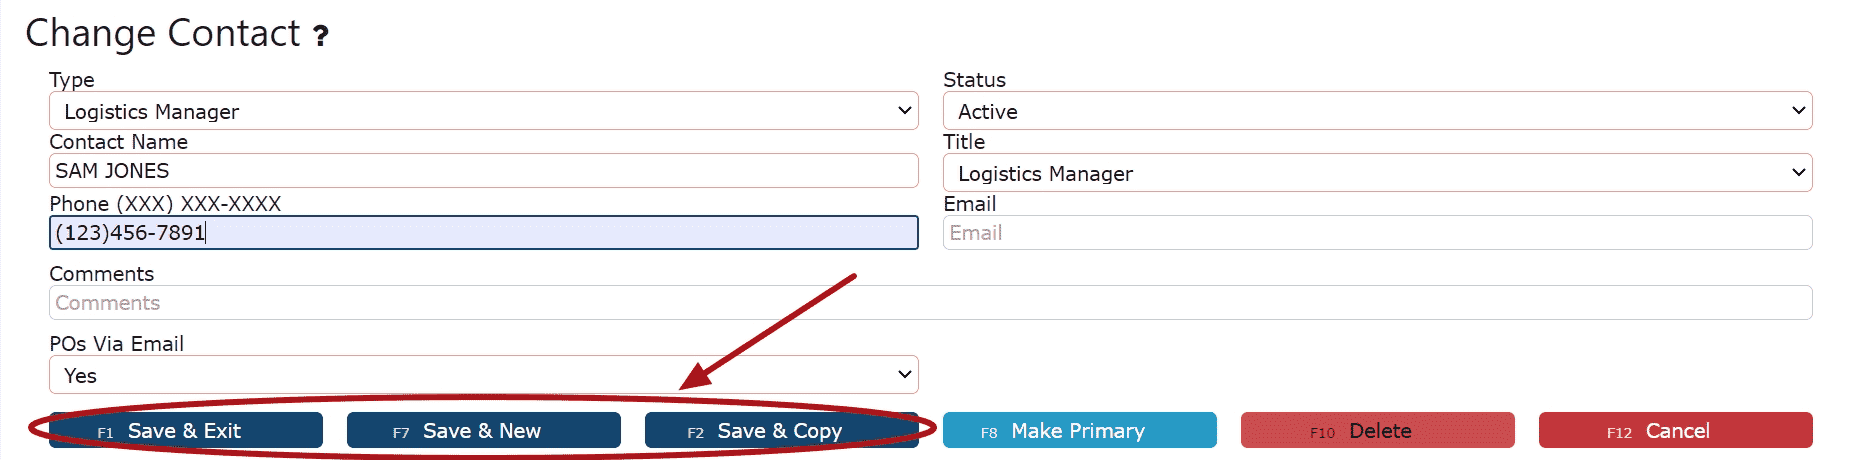
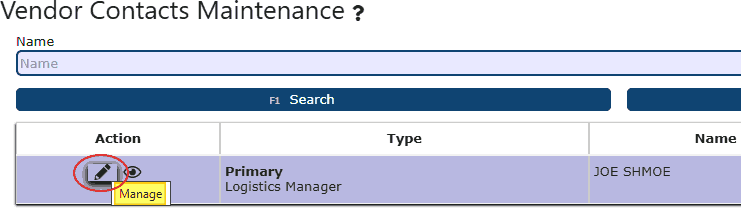
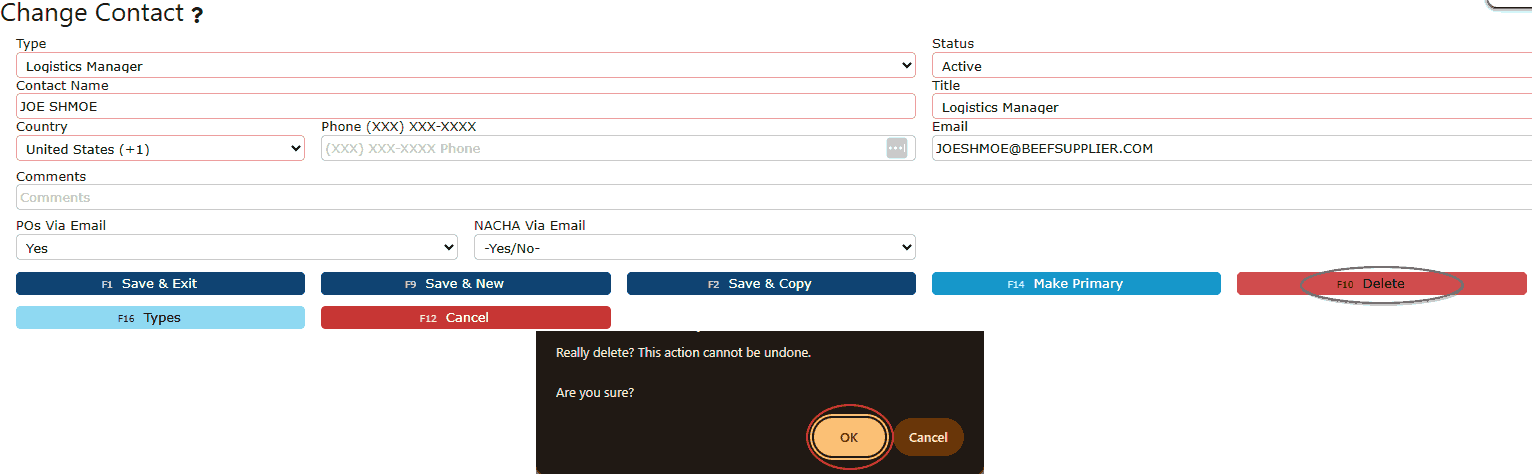
    Contacts (Accounts Payable and Logistics): Store and maintain key vendor contacts for billing, payment, and delivery coordination. Contacts can be assigned specific communication preferences such as receiving POs or NACHA files via email.
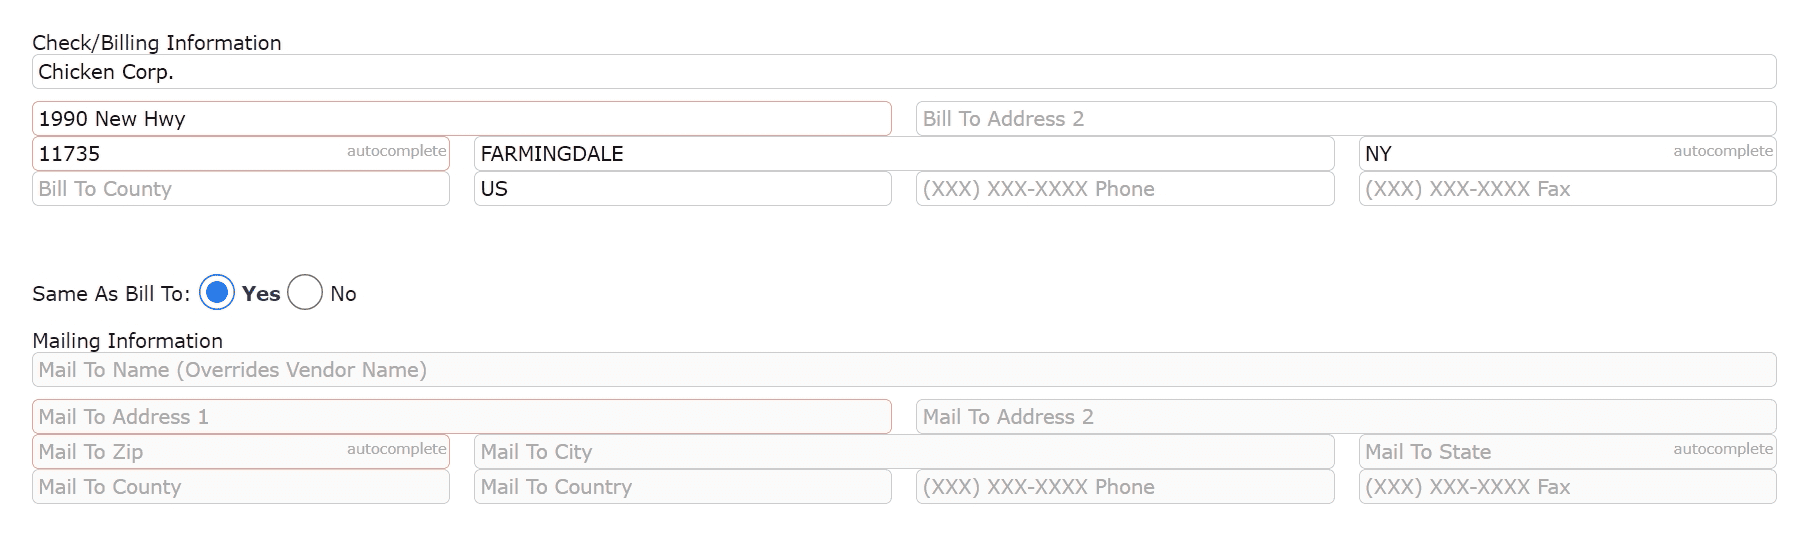
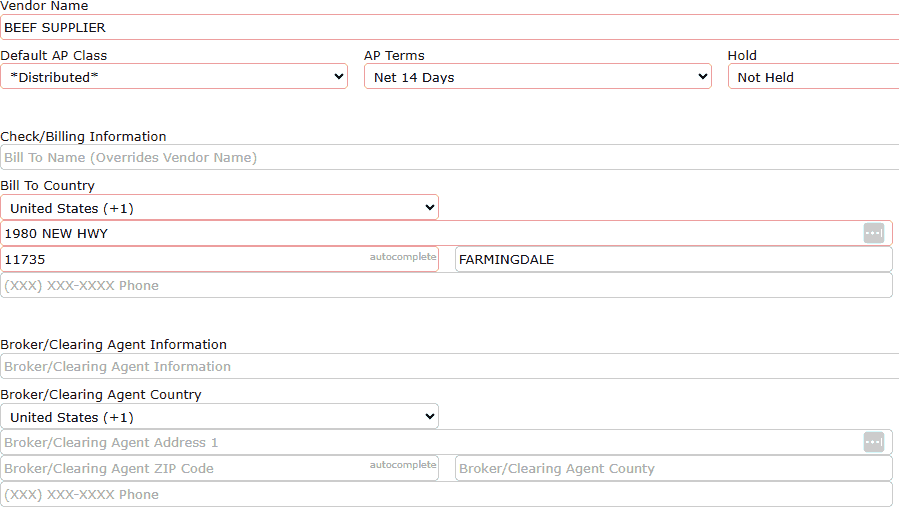
    Addresses (Billing and Mailing): Maintain accurate billing and mailing addresses to ensure all purchasing and financial documents are sent to the correct location.
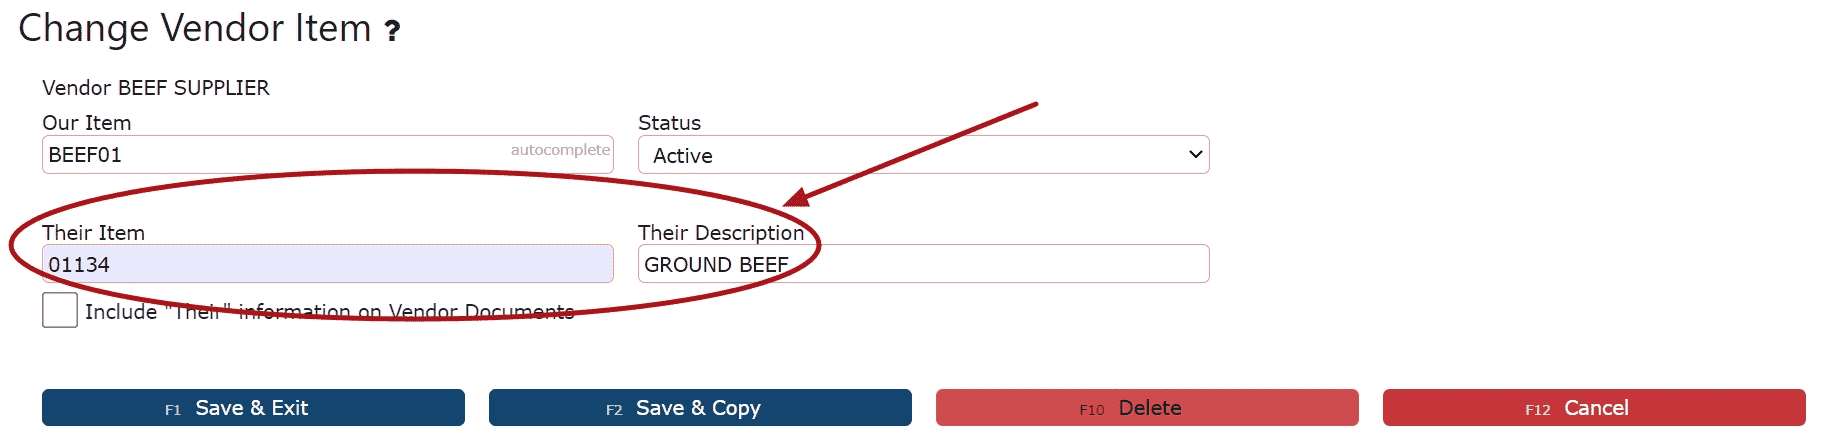
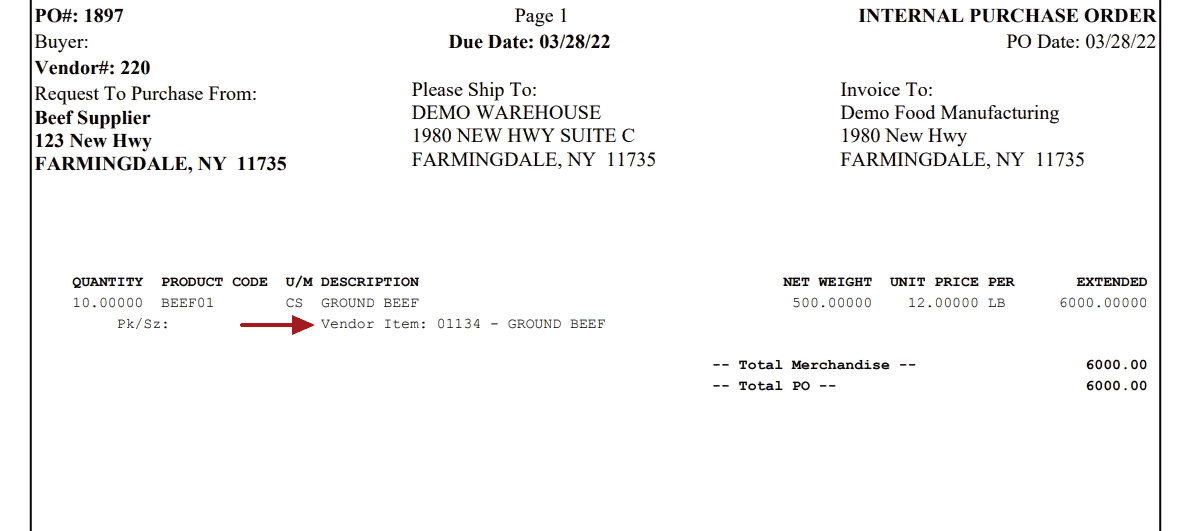
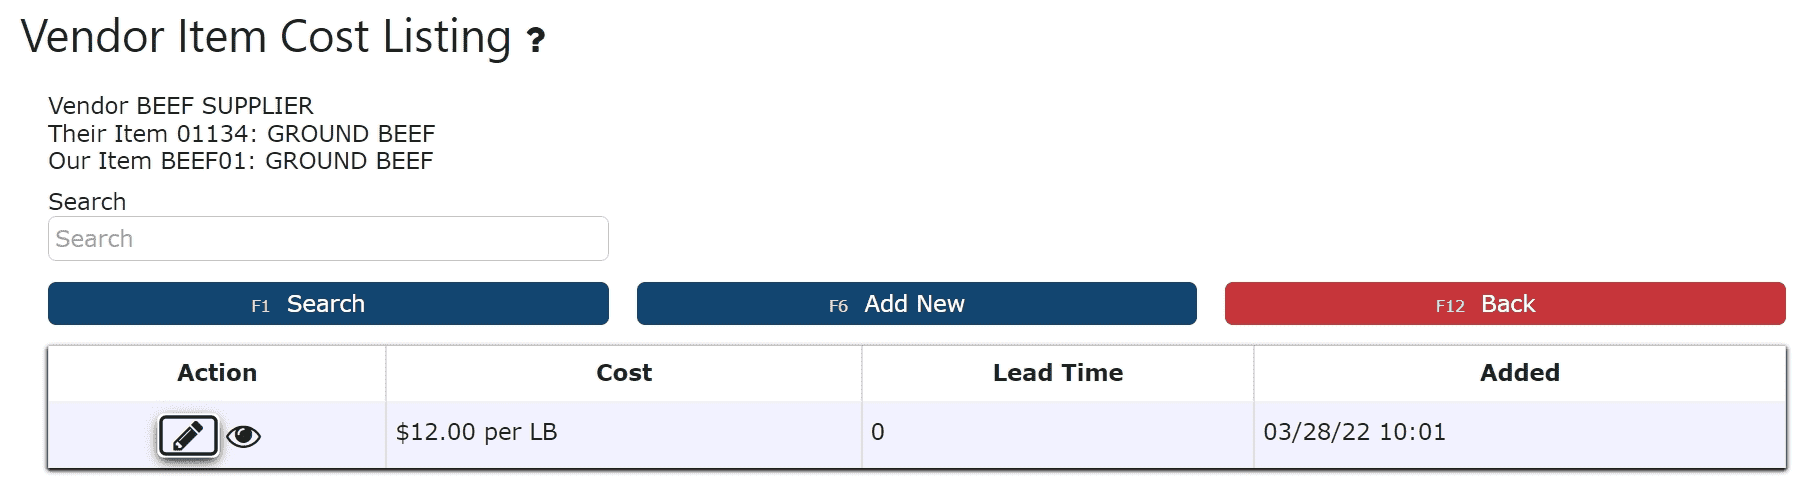
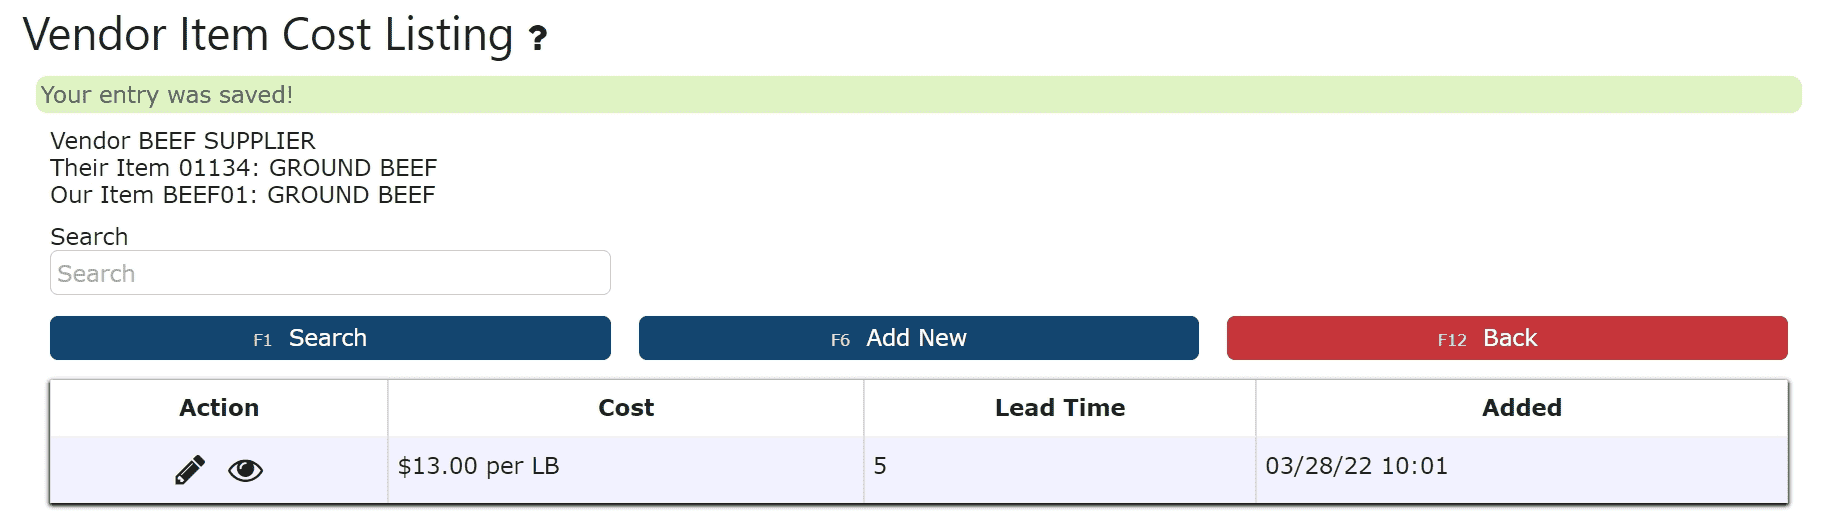
    Vendor Item Catalogs: Manage vendor-specific item details including item numbers, descriptions, and costs. These records automatically update as purchase orders are processed, ensuring pricing and item data stay accurate.

    Vendor-Specific Attachments: Upload and store relevant documents such as contracts, tax forms, certifications, or other vendor-related files for quick and easy reference.
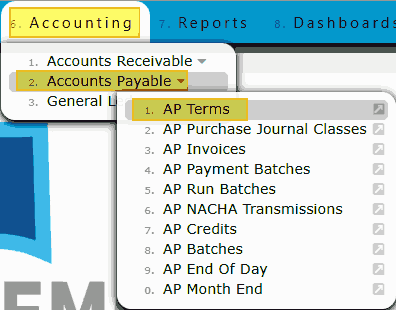
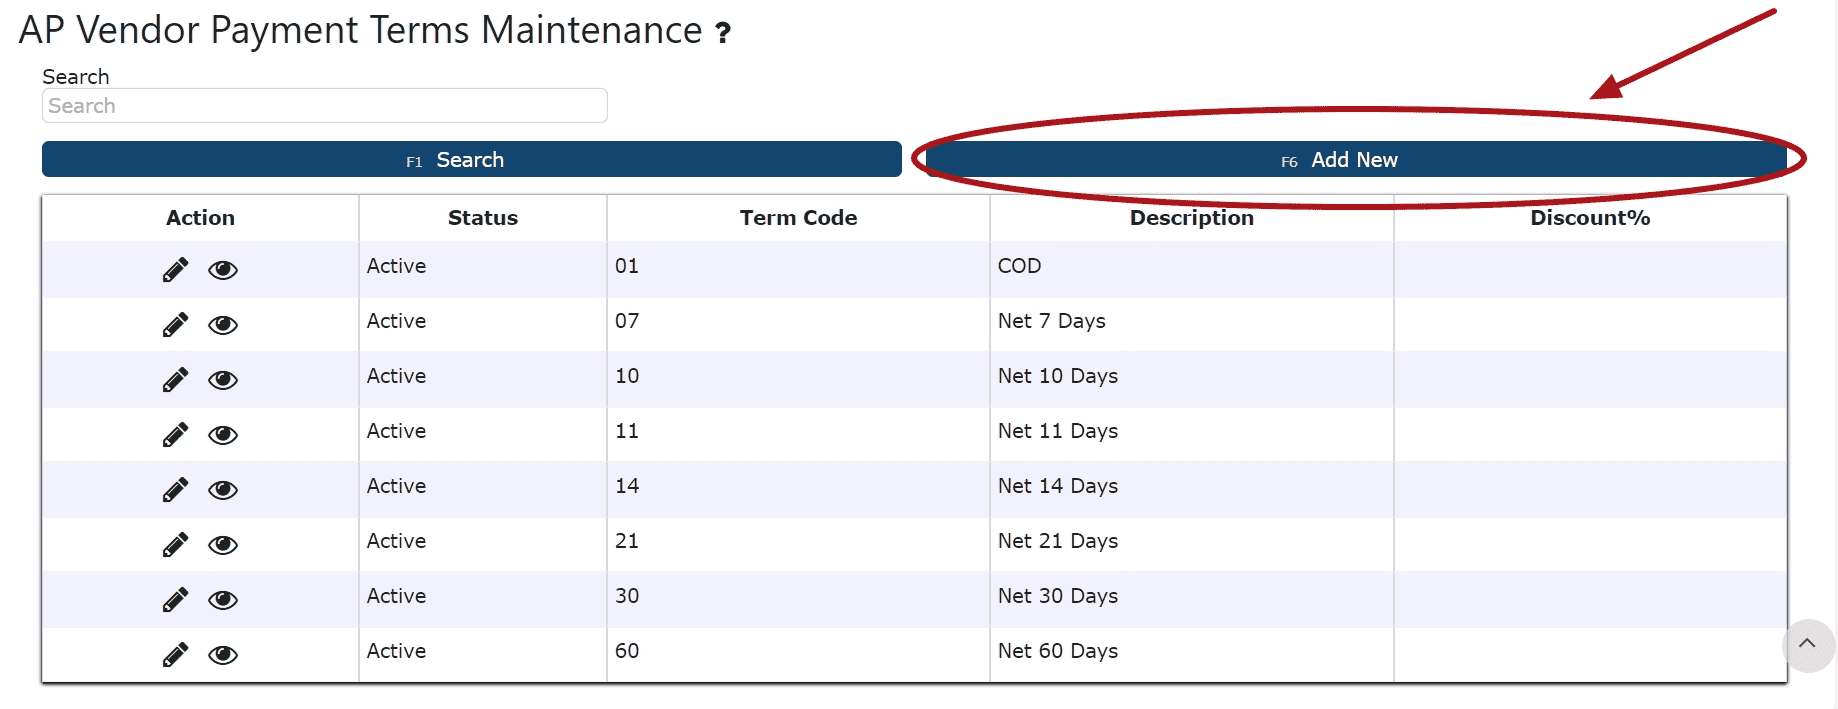
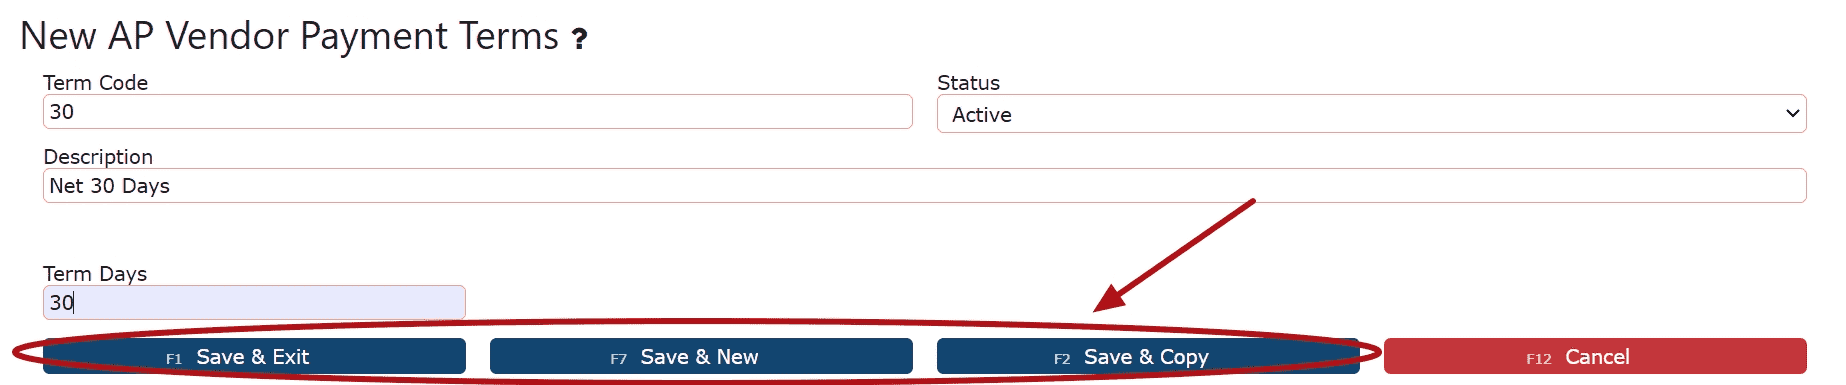
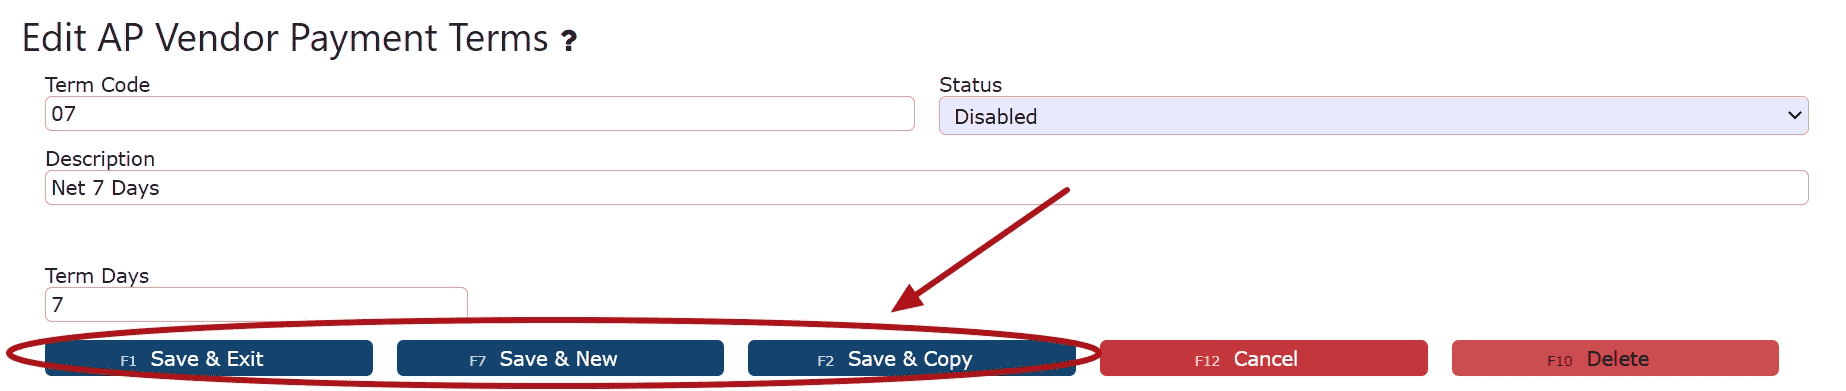
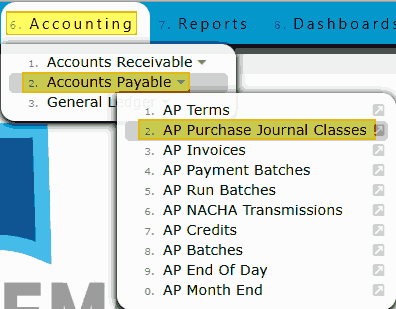
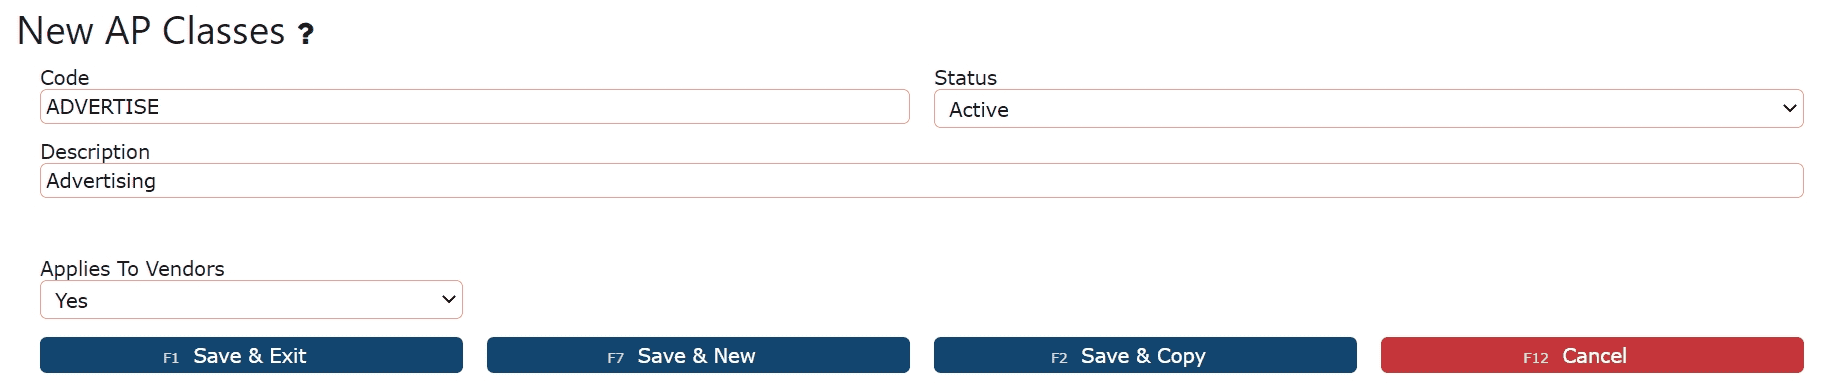
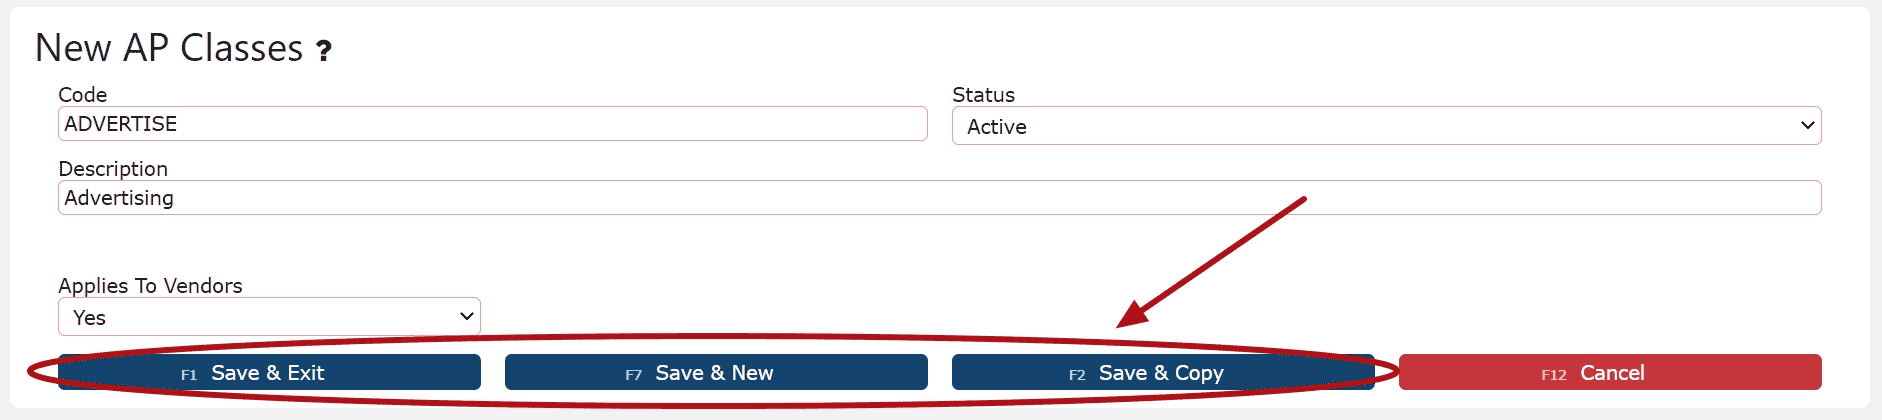
    Vendor Preferences: Configure essential settings such as AP Terms, AP Classes (with distributions), hold status, and other purchasing parameters that determine how transactions are processed for each vendor.

    Module Overview
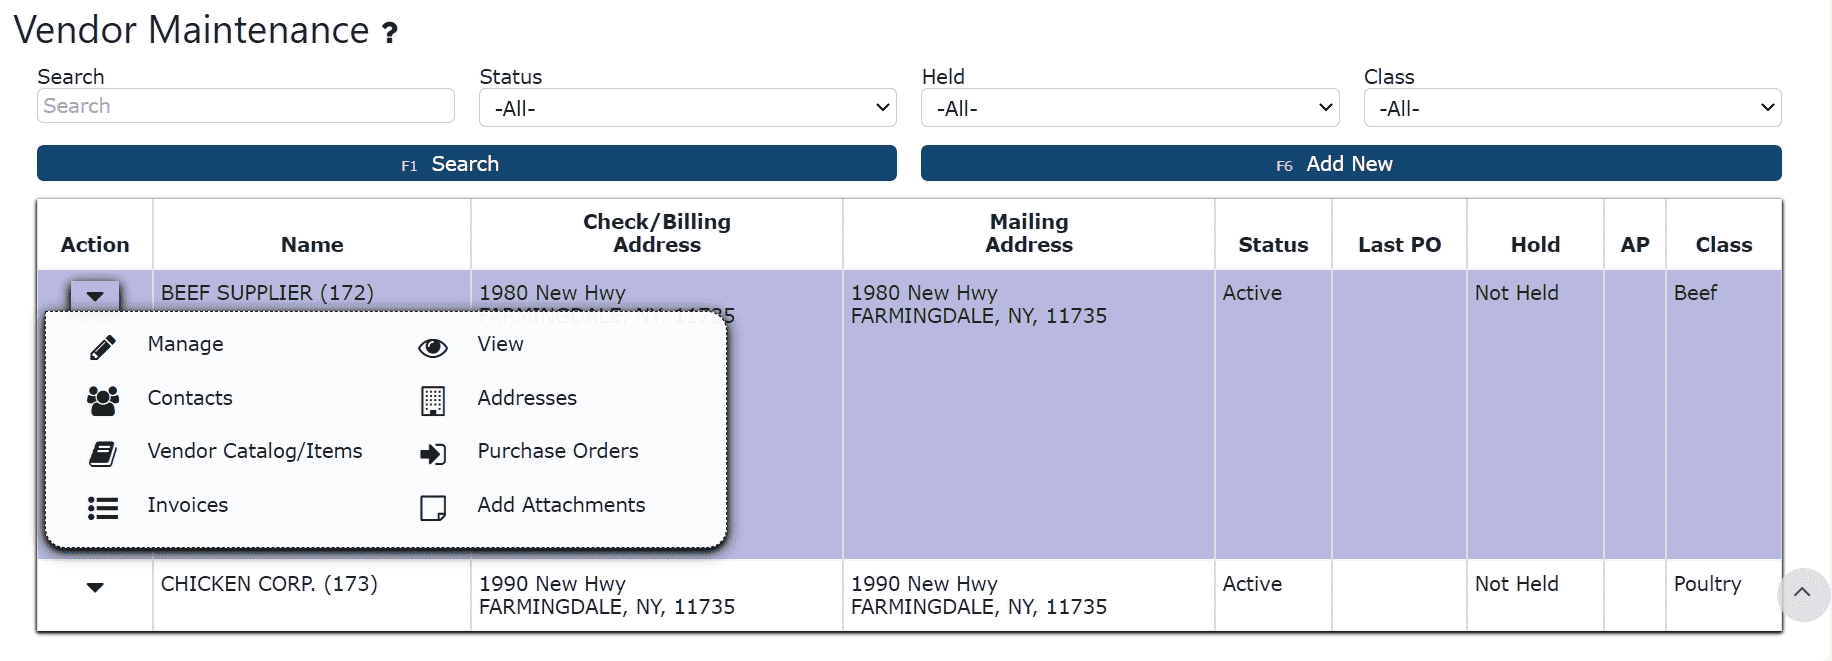
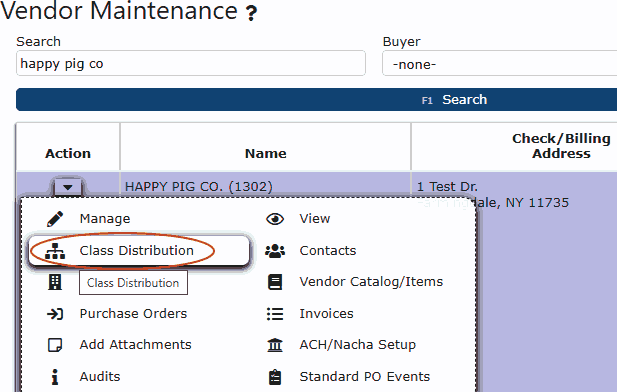
    Within the Vendors overview section, you can:

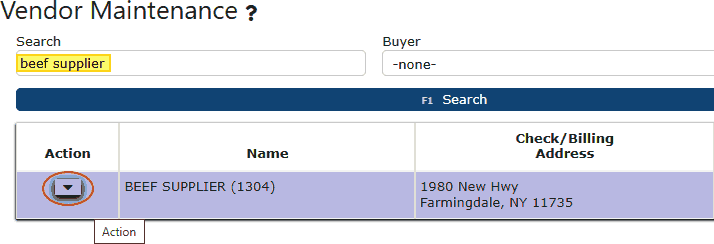
    • Create new vendor profiles complete with all required information and preferences.

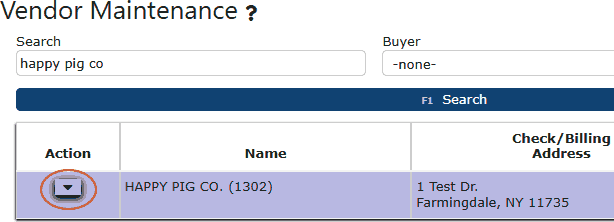
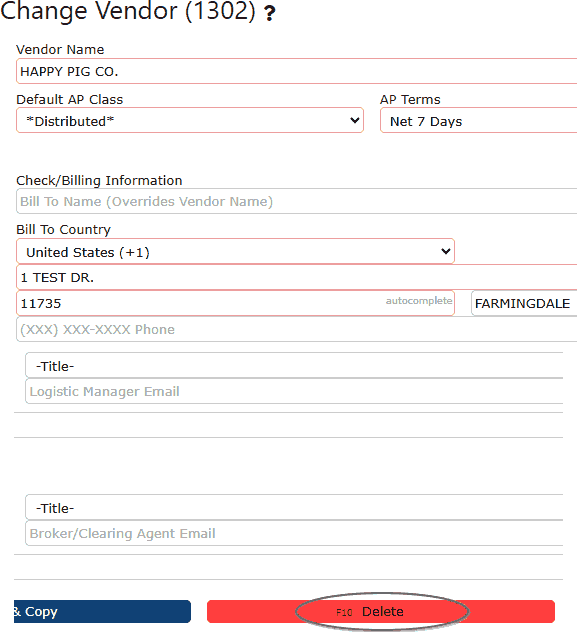
    • Edit or update existing vendor details and contact information as needed.

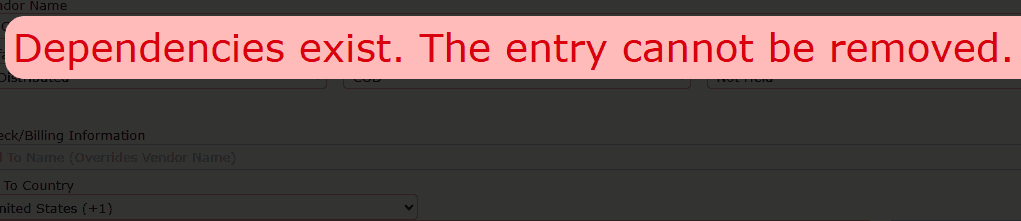
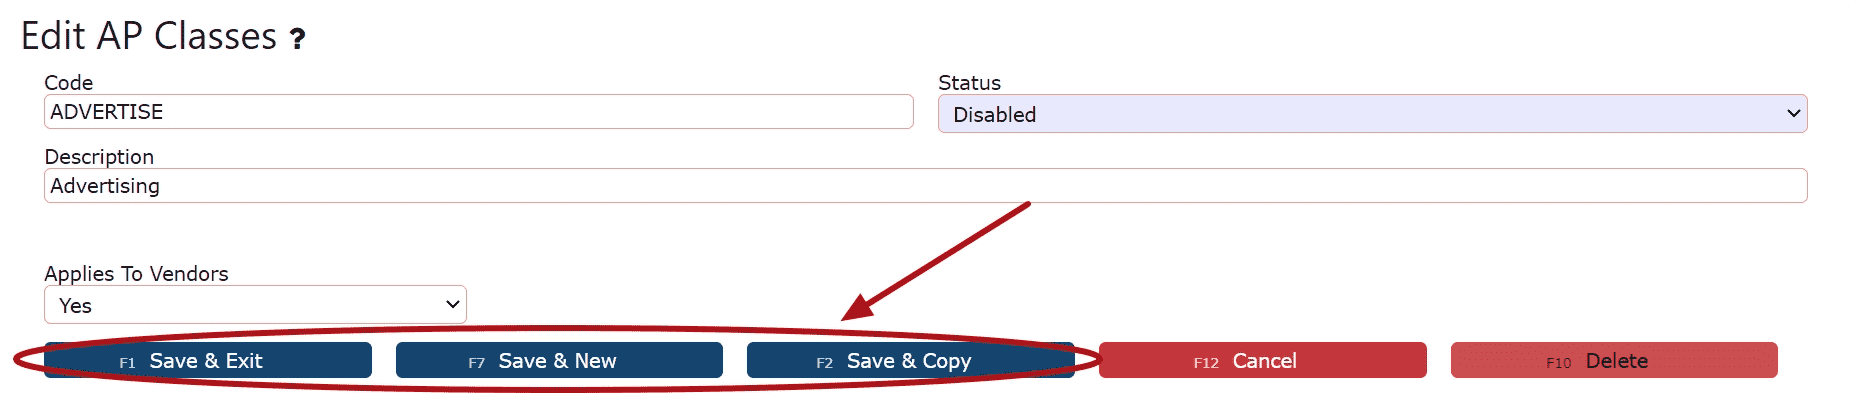
    • Delete or disable inactive vendors depending on purchase order history.

    • Manage vendor-specific item catalogs and associated costs.

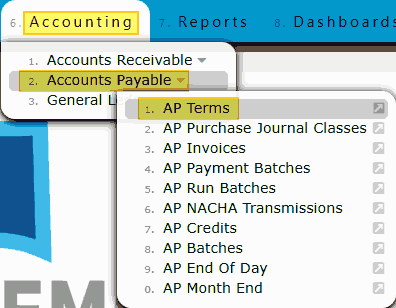
    • Define and maintain Accounts Payable terms and classes for vendor payment and posting structure consistency.

    By maintaining detailed and accurate vendor data, organizations can streamline the entire purchasing workflow — from order creation to invoice reconciliation — ensuring smoother operations and improved visibility across the supply chain.

Vendors

  • Creating a Vendor
    A quick and simple tutorial on how to create a new vendor in the system.

    1. Begin by navigating to the Purchasing menu and selecting the Vendors option from the submenu.


    2. Once on the Vendor Maintenance page, you’ll see a list of all existing vendors. This is where vendor details can be viewed, edited, and managed. To add a new vendor, click the Add New button (dark blue) located near the top of the page.


    3. After clicking Add New, the New Vendor entry screen will appear. Complete all applicable fields for the vendor. Be sure to enter all information highlighted in red, as these are required fields.


    4. Scroll down to the Billing Information section and enter the vendor’s address and any other relevant billing details.


    5. At the bottom of the page, you’ll find sections for the vendor’s Primary A/R Contact and Primary Logistics Contact information. Fill out these fields if available, as this contact information will be directly associated with the vendor record.
     
  • Editing a Vendor
    A quick and simple tutorial on how to edit an existing vendor.

    1. Begin by navigating to the Purchasing → Vendors menu.


    2. On this page, you’ll see a list of all active vendors. Locate the vendor you wish to modify and click the carrot icon next to their name to expand the management options.


    3. Once the management options are visible, select the pencil icon labeled Manage to open the vendor record for editing.


    4. You’ll now be on the Change Vendor screen. Make any updates as needed, including adjustments to general vendor details or contact information near the bottom of the page.


    5. After making your changes, scroll to the bottom of the page and click the Save & Exit button (dark blue) to finalize your edits.

  • Deleting a Vendor

    A Quick & Informative Tutorial on How to Delete a Vendor

    1. Begin by navigating to Purchasing → Vendors.


    2. Once on the Vendors page, you’ll see a complete list of all vendors currently in the system. To locate the vendor you wish to delete, use the search box in the upper-left corner of the screen and enter the vendor’s name or ID.


    3. After locating your desired vendor, click the downward-facing triangle icon under the Action column. This will expand a menu containing available options for managing that vendor.


    4. From the list of options, select Manage (indicated by the pencil icon) to open the vendor’s management screen.


    5. You’ll now be on the Change Vendor page, where vendor details can be edited. Scroll down to the bottom of the page until you see a set of action buttons. Click the red Delete button to initiate the vendor removal process.


    6. A confirmation prompt will appear, reminding you that this action is permanent and cannot be undone. Once you’ve verified your choice, click OK to confirm and permanently delete the vendor from the system.


    Note: You may encounter a red error message preventing you from deleting a vendor if there is existing purchase order history or if one or more contacts are still linked to that vendor.


    If there is no purchase order history, you can simply remove any associated contacts first. Once all vendor contacts have been deleted, you should be able to successfully delete the vendor without issue.

    However, if purchase order history exists, the system will not allow the vendor to be permanently deleted. In this case, the best alternative is to disable the vendor instead. To do this, open the Change Vendor page and locate the Status dropdown near the top of the screen, just below the vendor’s name. Select Disabled from the list, then click Save to finalize your changes.


Vendor Contacts

  • Creating a Contact

    A simple tutorial showing how to create an AP contact for a vendor

    1. First, navigate to the Purchasing → Vendors screen.


    2. Once on the Vendors screen, you’ll see a complete list of all vendors currently set up in the system. Use the search bar in the top-left corner to locate the vendor you want to add an AP contact for. After finding the correct vendor, click the downward arrow icon under the Action column to expand the available options. From here, select Contacts to access the vendor’s contact details.


    3. After selecting Contacts, you’ll be redirected to the Vendor Contacts Maintenance page for that vendor. To begin creating a new AP contact, click the Add New button near the top of the page.

     
    4. You will now be on the New Contact page. Enter all relevant information for the vendor contact, making sure to complete any fields highlighted in red, as these are required.


    5. Fill in any additional optional details as needed, and select Yes or No to indicate whether this contact should receive Purchase Orders & NACHA via email. Once all information has been entered, click one of the Save buttons to finalize and store your changes.

    Note: If Vendor POs & NACHA are to be sent via email, an email address must be provided.

    POs Via Email: Contacts marked as “Yes” will automatically receive Vendor PDF documents via email each time a Vendor PDF is generated.
  • Editing an AP Contact

    A quick & simple tutorial showing how to edit an AP contact

    1. First, navigate to the Purchasing → Vendors screen.


    2. In the search field near the top of the page, enter the name of the vendor whose contact you’d like to update, then click the dark blue Search button. Once the vendor appears in your results, click the downward arrow icon under the Action column to expand the available management options.


    3. From the expanded menu, select Contacts to open the Vendor Contacts Maintenance page. Locate the contact you wish to modify, then click the pencil icon under the Action column to begin editing the vendor contact.


    4. You will now be on the Change Contact page for the selected vendor contact. Make any updates as needed, then click one of the Save buttons at the bottom of the page to confirm and apply your changes.

  • Deleting a Contact

    A quick & simple tutorial showing how to delete an AP contact

    1. First, navigate to the Purchasing → Vendors screen.


    2. In the search bar at the top of the page, type in the name of the vendor whose contact you intend to remove, then click the dark blue Search button. Once the vendor appears in your search results, click the downward arrow icon under the Action column to reveal the available vendor management options.


    3. Clicking on the downward arrow icon will display a list of available options for that vendor. From the expanded menu, select Contacts to open the Vendor Contacts Maintenance page.


    4. You’ll now be on the maintenance page displaying all contacts associated with that vendor. Locate the contact you’d like to remove, then click the pencil icon to open the edit screen for that specific contact.


    5. On the Change Contact page, look at the bottom of the page where you’ll see a red Delete button. Click this button to begin the deletion process. A confirmation message will appear, notifying you that this action cannot be undone. Once you’ve confirmed your choice, click OK on the pop-up to permanently delete the AP contact.

Vendor Item Catalog

  • Managing a Vendors Item Catalog
    Use the Vendor Item Catalog to manage a vendor's item numbers and descriptions. 

    Note: After an item is entered into a PO initially, an entry for that item will automatically be added to the Vendor's Item Catalog at that cost.  This cost will then be used as a default in subsequent POs.  As POs are entered at different costs, the vendor's item cost will update accordingly.  

    1. Click on the Vendor Catalog/Items Icon


    2. Click on the Manage Icon


    3. Adjust the vendor's item number and description accordingly (Their Item and Their Description) 


    4. Check the checkbox to include "Their" information on Vendor Documents 

    Note: By checking this checkbox, the vendor's item number and description will display on the PO PDF, Dock Copy, and Vendor PDF.   


    5. Click on the Cost Icon, the the Manage Icon to manually update a vendor's item cost and maintain lead time 


AP Terms

  • Creating an AP Term

    A quick & simple tutorial showing how to create an AP Term

    1. Begin by navigating to the Accounting menu. From there, hover over the Accounts Payable sub-menu and select AP Terms.


    2. You will now be on the AP Vendor Payment Terms Maintenance page. To start creating a new AP term, click the dark blue Add New button located near the top of the page.


    3. On the New AP Vendor Payment Terms page, enter all required information. Provide a Term Code, Description, and specify the Term in Days (numeric value). When finished, click one of the Save buttons to finalize the entry. Once saved, your newly created AP term will appear in the list alongside all other existing terms.

    Examples: Net 7 Days -> 7 | Term Days -> 7
    Net 10 Days -> 10 | Term Days -> 10 

  • Editing an AP Term

    A quick & simple tutorial showing how to edit an AP Term

    1. Start by navigating to the Accounting menu. From there, hover over the Accounts Payable sub-menu and select AP Terms.


    2. You’ll now see a list of all AP terms currently configured for your company. Locate the AP term you wish to update, then click the pencil icon under the Action column to open it for editing.


    3. After selecting the edit option, you’ll be directed to the Edit AP Vendor Payment Terms screen. Make any required changes, then click one of the Save buttons to apply and confirm your updates.

AP Classes

  • Creating an AP Class

    A quick & simple tutorial showing how to create an AP Class

    1. Begin by navigating to the Accounting menu. From there, hover over Accounts Payable and select AP Purchase Journal Classes from the available options.


    2. You’ll now be on the AP Purchase Journal Class Listing page. To start creating a new AP class, click the Add New button (dark blue) located near the top of the screen.


    3. The New AP Class entry screen will appear. Complete all required fields marked in red, enter an appropriate AP Class Description, and review the information for accuracy.


    4. Before saving, confirm whether the Trade option should be set to Yes or No, depending on whether the class applies to vendors.


    5. Once all details are complete, click one of the Save buttons at the bottom of the page to finalize and create the new AP class.

  • Editing an AP Class

    A quick & simple tutorial showing how to edit an AP Class

    1. To begin editing an AP class, navigate to Accounting → Accounts Payable → AP Purchase Journal Classes to access the complete list of AP classes configured in the system.


    2. You’ll now be on the AP Purchase Journal Class Listing page. Locate the AP class you’d like to modify, then click the pencil icon under the Action column to open it for editing.


    3. The Edit AP Class page will appear. Update any fields as needed, review your changes for accuracy, and when finished, click one of the Save buttons at the bottom of the page to apply and finalize your updates.

  • Deleting an AP Class

    A Quick & Simple Tutorial on How to Delete an AP Class

    1. Begin by navigating to Accounting → Accounts Payable → AP Purchase Journal Classes to view the full list of AP classes currently configured in the system.


    2. You will now be on the AP Purchase Journal Class Listing page, which displays all existing AP classes for your company. Locate the AP class you wish to remove, then click the pencil icon under the Action column to open the record for editing.


    3. You’ll now be on the Edit AP Class page. While this screen allows you to modify AP class details, it also includes several action buttons near the bottom. Locate the red Delete button and click it to initiate the removal process. A confirmation prompt will appear, reminding you that this action is permanent. Once you’ve reviewed the message, click OK to confirm and finalize the deletion of the AP class.


    Note: If you receive a red “hard-stop” error message preventing deletion, it likely means that the AP class is currently assigned to one or more vendors.


    To resolve this:

    1. Navigate to Purchasing → Vendors.

    2. Locate the vendor associated with the AP class, then click the downward-facing triangle icon to expand the available options.

    3. Select Class Distribution from the list.


    4. On the AP Class Distribution Maintenance page, click the pencil icon beside the relevant distribution record to open it.

    5. On the Change AP Class Distribution page, click the red Delete button to remove the link.

    Repeat this process for any other vendors that may have the AP class assigned. Once all dependencies are cleared, you’ll be able to successfully delete the AP class.